The HelpStudio Style Picker allows you to apply or remove existing Style Rules to content in your Project as well as create, edit, and delete Style Rules and Template Style Rule Overrides.
The Style Picker displays Style Rules that are defined in the custom Stylesheets in your Project or the active Custom Template that are applicable to the currently selected content in the active editor.
An available Style Rule in the Style Picker is displayed as:
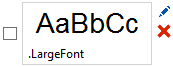
A preview of the Style is displayed in the top section. The name of the Style Rule is shown in the bottom left. The CSS of the Style is also displayed as a tooltip. The Edit and Delete buttons can be used to directly edit or delete the Style Rule.
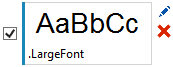
A Style Rule can be applied to selected content by selecting the checkbox adjacent to it. If a custom Style Rule is applied to the selected content it is displayed in the Style Picker with a select and a highlight strip:
Create a New Style Rule
- In the Style Picker dock window, click the Create a new Style Rule
 toolbar button.
- In the New Style Rule wizard, select the stylesheet where you want to save the new style rule. you can save it in either the Project Stylesheet or the Template Stylesheet.
- Select Next.
- Enter a name for the new style rule and set the properties, including font, background, border, text, position, layout, box, list and table.
- Select Finish.
The new style rule is created and displayed in the Style Picker dock window.
You can also create styles in the Stylesheet Editor. These styles will then be available in the Style Picker.
Apply an existing Style
- To apply a style to existing content, select the content either by highlighting it with the mouse or by selecting the element from the Page Map.
- In the Style Picker dock window, check the style rule or style rules you want to apply.
The selected content is styled with the selected style rules.
Remove applied Styles
- To remove an applied Style Rule from content, place your cursor within the content (or select the tag on the Page Map).
- In the Style Picker dock window, clear the checkbox next to the style rule(s) you want to remove.
The style is removed from the content.
Edit a Style Rule
- In the Style Picker dock window, click the
 Edit button next to the style rule you want to edit.
The Edit Style Rule window opens. - Edit the properties of the style rule as needed.
- Select OK.
The updated style rule is immediately reflected in any open content editors and in the Style Picker.
Delete a Style Rule
- In the Style Picker dock window, click the
 Delete this Style Rule button next to the style rule you want to delete.
- Select Yes to the confirmation prompt.
The Style Rule is permanently deleted.
Change Element Type
- Select an element in the Topic editor.
- In the Style Picker dock window, click the Element Type dropdown menu.
- Select the required element type from the dropdown.