In addition to the content you author, it is likely that your HelpStudio project contains one or more CSS stylesheets, images, or script files. HelpStudio includes a range of functionality to help you work with these Other Files.
Other Files Fundamentals
Add an Existing Image to the Project
- On the Project tab, click the Add existing Image file button.
- On the displayed file dialog, select the file or files to add to the project.
- The selected files are added to the project and are then available for selection in the Insert Image dialog.
Capture a new Image
To capture an image.
- Select the Capture Image button in the Project ribbon menu.
Image Capture dialog box appears.
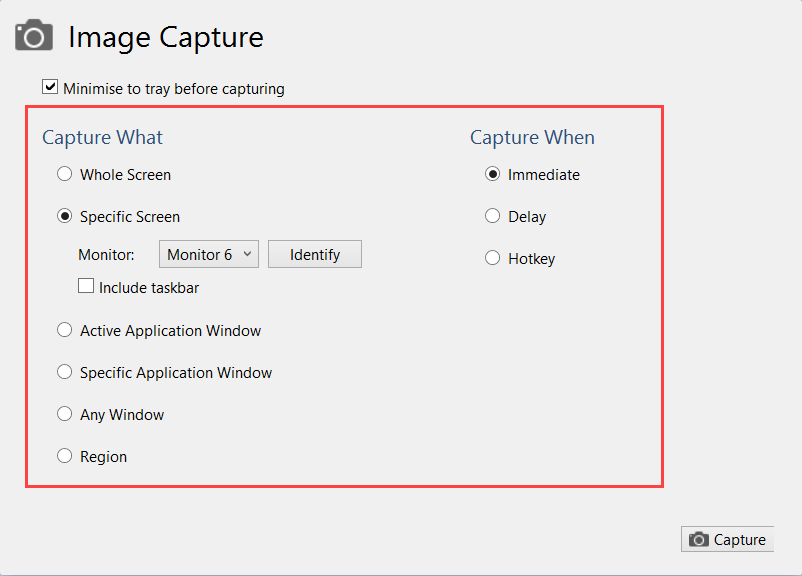
- Select the required options and click Capture.
The Image Capture dialog box allows you to choose when the capture will take place (immediate, after a specified delay, or on a defined hotkey) and what the capture target is (whole screen, specific window, specific region etc).
- Select on the Save button to save the captured image and complete the capture process.
After capturing an image a preview will be displayed and options to change the filename, create a thumbnail, add a drop shadow and add the image to the currently open project.
Edit an Image
- Select an image on the Project Explorer.
- Right click on the image to show the Context Menu.
- Select Edit Image from the Context Menu.
- The image will be opened for edit in the integrated Image Editor.
Create a Thumbnail from a full size Image
- Select a full size image on the Project Explorer.
- Right click on the image to show the Context Menu.
- Select Create Thumbnail from the context menu.
Add an Existing StyleSheet to the Project
- On the Project tab, click the Add existing StyleSheet file button.
- On the displayed file dialog, select the file or files to add to the project.
- The selected files are added to the project, included by default in each generated Topic and the styles contained within the stylesheet are available for use on the Style Picker.
Create a New StyleSheet
- On the Project tab, click the New StyleSheet button.
- When prompted, type the desired filename for the new StyleSheet.
- The new StyleSheet is then created and opened for edit in the StyleSheet editor.
Exclude Scripts or StyleSheets from a Topic
By default, each Topic automatically includes all of the stylesheet and script files you add to the project. If you wish to prevent certain stylesheets or scripts being used in a particular topic you can do so by excluding them in the Properties editor:
- On the Project Explorer, select the Topic or Topics where you wish to prevent one or more stylesheets or scripts being included.
- In the Properties Window, click the button adjacent to the Excluded Other Files property.
- On the displayed dialog, select the stylesheets or scripts that you don't want included.
- Click Ok.
Exclude Files from being Included in the Output
Excluding a file from being included in any online output
You may want to include some files only in booklet output (e.g. StyleSheets specific to booklet output).
- Select the file or files on the Project Explorer.
- In the Properties window, click on the Exclude from Online build flag in the Build Flag Picker at the top of the Properties editor.
- Files marked with the Exclude from Online flag are only included in booklet output.
Excluding a file from being included in any booklet output
You may want to include some files only in online help output (e.g. StyleSheets specific to online output that you don't want used in booklet output).
- Select the file or files on the Project Explorer.
- In the Properties window, click on the Exclude from Booklet build flag in the Build Flag Picker at the top of the Properties editor.
- Files marked with the Exclude from Booklet flag are only included in online output.
Include or exclude a file for a particular Build Profile
Using Build Flags you can create specific Rules in your Build Profiles that govern which files are included in which outputs.
See the Single Sourcing topic for information on how to use Build Flags and Build Profiles to create multiple outputs containing different sets of files.
Remove a File from the Project
- Select the file or files you want to remove on the Project Explorer.
- Click the
 Project Explorer toolbar button.
- The files are removed from the project and you are prompted to confirm if you also wish to delete the files from disk.