Document! X fully supports documentation of JavaScript libraries. A comprehensive documentation set is generated providing an instant reference documentation set that the users of your JavaScript library can use.
You can use JSDoc tags in order to provide extra structural information and documentation content in the source code. Document! X supports the following JSDoc tags: @constructor, @class, @enum, @interface, @struct, @namespace, @returns, @param, @protected, @private, @extends, @see
You can also use .NET standard XML source comments in order to author content in the source code and/or use the Document! X Content File editor to author additional content outside of the source.
JavaScript Reference Documentation Fundamentals
Create a New JavaScript Reference Documentation Project
Create an Empty Project
Creating an empty project creates a project without any content. You can customize its settings according to your needs.
To create an empty project:
- Click the Application Button at the upper-left of the Ribbon Menu.
- Click New and then select Empty Project.
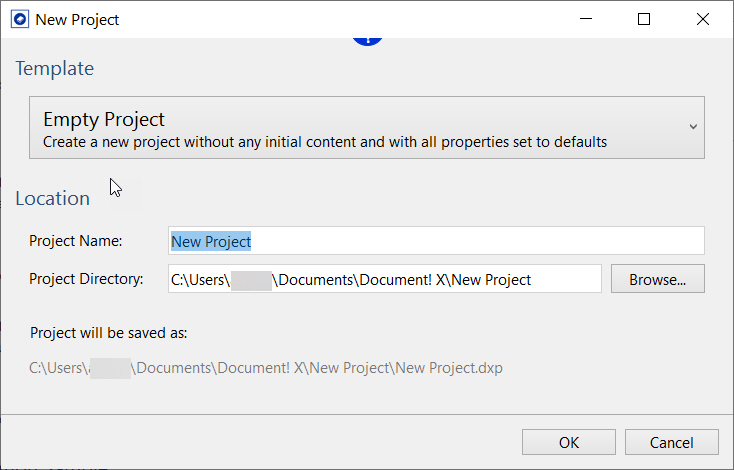
- Enter a project name in the Project Name field.
The project is created at the default directory which is configurable in the Options Editor (Paths page). However, you can optionally choose a specific directory to save your project by browsing the Project Directory field.
- Click OK.
The new empty documentation project is created and opened for edit. You can now add the JavaScript Libraries that you wish to document:
- On the Project tab, click the Add JavaScript Library option.
- In the JavaScript Library dialog box:
- Click the Add dependency
 toolbar button and select the JavaScript files that are dependencies for the JavaScript files that are documented.
Any JavaScript files added as dependencies will not be documented. Do not include JQuery as a dependency as it is loaded by default.
toolbar button and select the JavaScript files that are dependencies for the JavaScript files that are documented.
Any JavaScript files added as dependencies will not be documented. Do not include JQuery as a dependency as it is loaded by default. - Click the Add from File
 toolbar button and select the JavaScript files that you want documented.
- Click the text in the right pane. Document! X gathers some basic information on the objects in the JavaScript files. Discovered types are divided into three types:
Before loading the JavaScript type information, ensure that the JavaScript files are ordered correctly (i.e. as if they were being loaded in a browser instance).
Non-Constructable
Non-constructable types are types that have been automatically found by Document! X but can't be constructed using a default constructor (without parameters). You can specify a custom constructor for each type in the textbox below the type name. The custom constructor statement can be any valid JavaScript statement that returns an object of the required type, for example:
new MyObject("parametervalue")
Non-constructable types without a custom constructor are not included in the documentation.
Automatic
Automatically found objects are objects that Document! X has inferred type information for either based on XML / JSDoc tags or by analyzing the runtime JavaScript object.
The inferred type can be overridden by selecting a different type in the combobox next to the name of the object.
Ambiguous
Ambiguous objects are objects that Document! X cannot automatically infer type information for.
A specific type can be selected in the combobox next to the name of the object.
Excluded Global Objects
Excluded global objects are objects that were found in the dependency files and have been excluded from the analysis. You can force Document! X to include these objects in its analysis by checking the checkbox next to the object name.Objects that weren't found can also be added specifically by qualified name (e.g. namespace.type) in the textbox under the Explicit heading. - Click the OK button to add this JavaScript Library to the project.
- Click the Add dependency
The selected JavaScript library is added to the Project Explorer under the JavaScript Libraries node. You can expand down through each child node to select / deselect individual namespaces or types in order to include / exclude them from the generated output.
A Content File is created and added to the project under the Content Files node for each Ajax Component you add to the project. You can use this Content File to author additional content in the pages that Document! X automatically generates.
Author Content in Source Code
You can use the .NET standard XML comments or JSDoc tags in JavaScript source code to provide structural and / or documentation content that is used in the generated output.
XML Example
function myType(p1, p2) {
    ///<summary>constructs a new myType object</summary>
    ///<param name="p1" type="string">p1 summary</param>
    ///<param name="p2" type="number">p2 summary</param>
}

///<summary>field summary</summary>
myType.prototype.field = 0;

///<summary>method summary</summary>
///<param name="p1" type="string">p1 summary</param>
///<returns type="number">method returns</returns>
myType.prototype.method = function(p1) {
}
JSDoc Example
/**
* constructs a new myType object
* @constructor
* @param {string} p1 p1 summary
* @param {number} p2 p2 summary
*/
function myType(p1, p2) {

}

/** field summary */
myType.prototype.field = 0;

/**
* method summary
* @param {string} p1 p1 summary
* @returns {number} method returns
*/
myType.prototype.method = function(p1) {

}
Author content outside of the source code
If you would like to supplement the content of the pages automatically generated by Document! X and HelpStudio outside of the source code, you can do so using the Document! X and HelpStudio Content File Editor.
The Content File Editor allows you to review and author content for any item for which a reference documentation page is generated.
To open the Content File Editor:
- Expand the Content Files node on the Project Explorer.
- Locate the Content File for the item you wish to author content for.
- Right-click the Content File and select Edit.
- The Content File opened for edit. The tree on the left side of the editor shows you a hierarchical view of the item you are documenting.
- Drill down and select an item from the tree and the related documentation pages are shown in the right side of the editor.
- Select a specific content type from the toolbar/vertical menu to edit a specific type of content, for example, Summary, See Also, and Keywords.
- Type directly in the editable portions of the page on the right side of the editor.
Add Conceptual Topics
Conceptual information is a key part of reference documentation, providing a high level introduction, tutorials, or other conceptual information. You can easily create conceptual topics in Document! X.
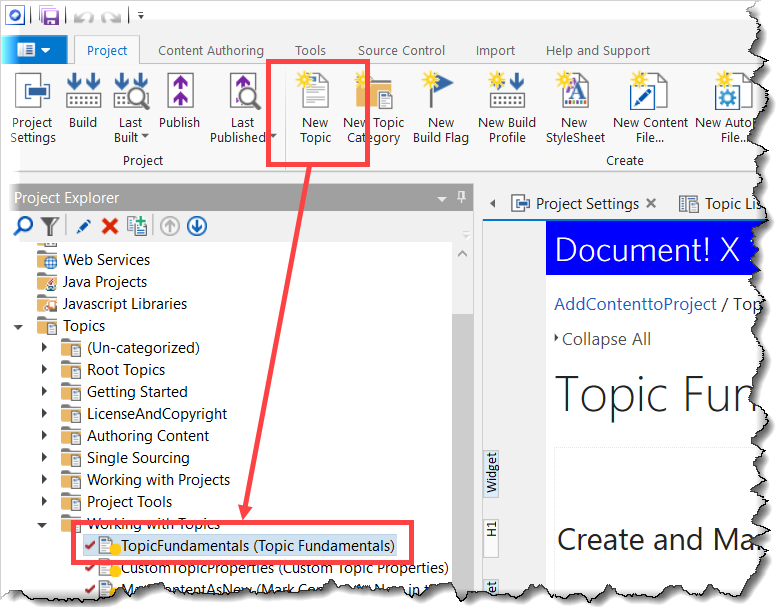
- Click the New Topic button on the Project tab or use the Ctrl+T shortcut key.
- The new Topic is created in the currently-selected Topic Category on the Project Explorer (or under the (Un-categorized) node if no category is selected) and opened for edit.
- Enter your conceptual content directly in the editable area of the Topic Editor.
You can find more information on Topic Editing in the Topic Editor topic.
Change JavaScript Documentation Settings
The settings that govern JavaScript documentation generation are defined in the Build Profile editor. In a new project there is a single Build Profile but you can define many build profiles if you want to create multiple outputs with different settings.
To edit JavaScript documentation settings:
- On the Project Explorer, expand the Build Profiles node.
- Double-click the required Build Profile to edit the properties.
Alternatively, you can also right-click the required Build Profile and select Edit to open the Build Profile editor.
In the Build Profile editor, you can find the JavaScript Settings pages under the Reference Documentation section.
Identify Undocumented Items
An essential part of delivering a complete documentation set is ensuring that all the items have been documented. Document! X includes the Undocumented Items tool to quickly and easily identify undocumented items.
- On the Tools tab, select the Undocumented Items option.
- Select the profile in the Project Profile field for which you want to find the undocumented items.
If your project contains only one Build Profile then it appears in the Project Profile field by default.
- Select Item Types, for example, Class, Method, Schema, and Column, that you want to check for undocumented items.
- Select Content Types to indicate the items that must be considered documented (just Summary by default).
- Select the Content Sources that should be used when checking for content.
- Select Execute. Any undocumented items will be listed in the results grid.
Build and Deploy JavaScript Reference Documentation
On the Project tab, click the  Build button to build your JavaScript Reference Documentation.
Refer to the Deployment topic for more information on how to deploy your documentation to other machines.