Using Facebook for Community Features
In This Topic
If you choose the Facebook Community Provider, the Facebook Comments Plugin is automatically integrated with the output you generate. The Facebook integration provides your users with Community discussion and sharing functionality using their existing Facebook logins.
Setting up Facebook Community Features
To enable Community Features using Facebook, you must first get a Facebook Application ID that uniquely identifies the content you will be using Facebook Community Features in and then configure the settings on the Community Features page in the Build Profile Editor.
Get a Facebook Application ID
- Open the Build Profile Editor and select the Community Features page.
- Select the Include Community Features option.
- Select Facebook from the Community Provider dropdown.
- Under the Settings heading, click the Create New button (or visit https://developers.facebook.com/quickstarts/?platform=web) which takes you to the Facebook login page.
- If you have an existing account you wish to use, login, if not click the Sign Up For Facebook and follow the instructions to create the new Facebook Account.
Once you have logged in, you are taken to the Facebook Quick Start for Website page:
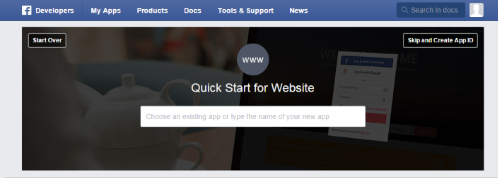
Quick Start for Website Facebook Page
- Type an identifying name for your documentation project. This should be a descriptive name, e.g. "Fabrikam Documentation".
- Once you have typed a name, a Create New Facebook App ID button appears. Click that button, and a further Create a New App ID dialog appears:
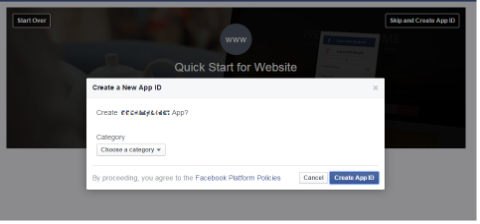
Create a New App ID dialog
- Choose the Category that best matches your content and then click Create App ID.
- On the page that is then displayed, scroll to the bottom of the page (ignoring the part labelled Setup the Facebook SDK), and complete the Tell us about your website section:
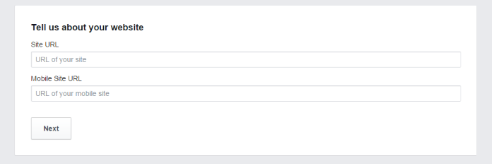
Tell us about your website settings
- The value you provide in Site URL must match the URL (or be a parent URL) to which you will be publishing your content. You can leave the Mobile URL blank.
- Click the Next button.
The Facebook Application is created and you are taken to the Dashboard for the new Facebook Application.
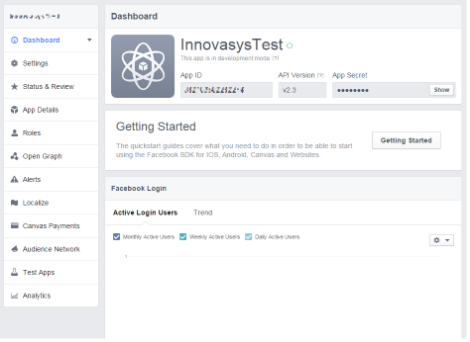
Facebook Application Dashboard
Make a note of the App ID (highlighted in the screenshot below) as that value is required in the Community Features setting in the Build Profile Editor.
Configure the Build Profile to use Facebook for Community Features
- Open the Build Profile Editor and select the Community Features page.
- Ensure that the Include Community Features option is selected.
- Ensure that Facebook is selected from the Community Provider dropdown.
- Under the Content Publishing URL section, identify the location to which your content will be published. If you are using Publishing features you can select from an existing Publishing Target, otherwise type the URL into the Use this specific URL\Content URL field.
- Type or paste your Facebook Application ID into the Facebook Application ID field (see Get a Facebook Application ID section above).
Managing Community Content
Once your project has been configured for Community Features, the Moderate Content and Manage Settings are enabled on the Community Features page in the Build Profile Editor. Those buttons launch a browser that takes you to the correct page on your chosen Community Provider's website.
Once you have Built and Published your project after configuring the Community Features page, you will also be able to view and manage community content directly within the Topic Editor and Content File Editor and directly in the generated output.
See Also